
From the creative side, my involvement with the machinima project has mostly centred around the audio aspects, camera work, and some writing.
I spent some time working out how to use the camera views available in SL. When you are using your avatar, that is your avatar’s view, however by holding the Alt key down, and clicking on other objects, you can set those objects as your “focus”. Then everything you see is focused on that object. While holding down the Alt key and moving around, you can view the focal point from different angles. This works out very well because you can “park” your avatar somewhere out of the way, and simply change your focus depending on what you wish to film. Another trick I figured out, was if your avatar is sitting, it is not necessary to hold down the Alt key while you change your perspective on your focus. This was very helpful because I often forgot to hold down this key and would lose focus on the object being recorded. This was very frustrating.
The camera movements unfortunately are at a fixed speed, and so zooming in, out, up, down, and around can only been done at that speed. I experimented with repeatedly pressing the arrow keys to slow the movement, which works to a degree, but does make the movements very “jerky”. Not good enough. So then we decided we would look at using the video editing software to slow the film down where these camera movements took place. In the end though, we decided that the fast zooming in and out worked pretty well as an effect theme throughout the production and it looked pretty good. So we stuck with that approach. If in future we wish to have a more dramatic effect in slow movements, we will need to do some further research into how this can be done.
Before you start recording, you need to configure your SL client in such a way as to minimise any on-screen information which detracts from the picture. A typical view will include avatar names, toolbar buttons, maps, chat dialogs and so on as shown below.
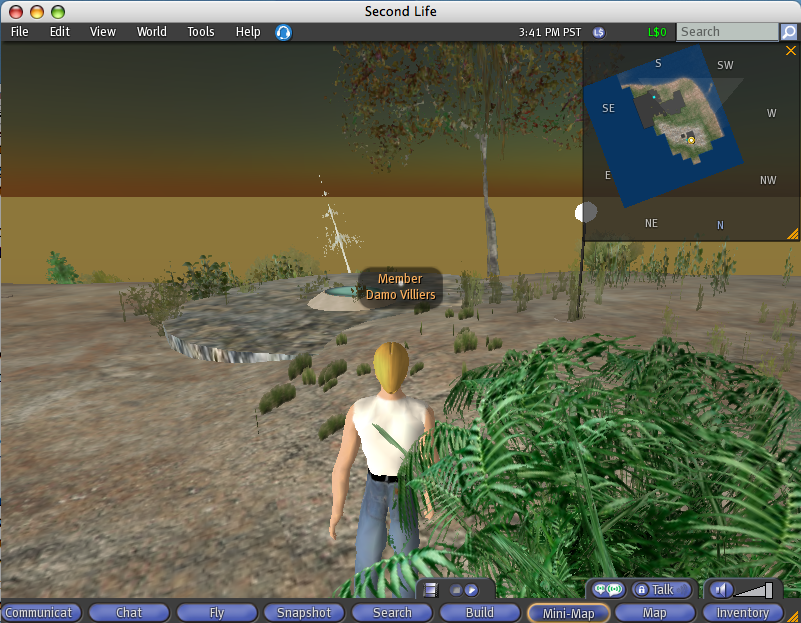
These must be disabled before filming. Things that cannot be disabled included the menubar at the top, and the audio buttons at the bottom. The screenshot below illustrates this.

The top and bottom of the video will need to be cropped or letterboxed to remove the information.
From these screenshots, you may have noticed that one is from a Microsoft Windows machine, while the other is from a MacIntosh. My desktop computer is a Mac, but unfortunately the movie recording function of the SL client is broken in the Mac version. A visit to Linden Labs support site list this as a known bug, however it appears it is a low priority to be fixed. So all camera recording is limited to Windows clients at this point. Very disappointing, as we are using iMovie on the Mac to edit the video. This is for discussion in another post.
When you select the Record a Movie option from the File menu, you are asked where to save your video file. Then you are presented with a list of codecs to choose from for encoding your video. I experimented with a couple of different codecs, but found that Microsoft Video 1 seemed to provide good quality while keeping the file sizes to a reasonable level. iMovie was also capable of working with these files, so we continued with it. I set key frames every 50 frames, and set the compression levels to be 100% to keep the best quality as possible. In retrospect, if we do this again (which I hope we do), I will install Quicktime on the computer so we can use Quicktime format. This will certainly work in iMovie, or any of the Mac video editing suites and will give excellent quality.
More to come…

Leave a comment