Introduction
Welcome to the CQUni Second Life (SL) Orientation Workshop Website. Here you will find a series of activities for those totally new to SL, and interested in exploring its potential for application in education. The focus of this workshop is to teach basic competencies in using SL, develop some ideas for application in learning and teaching at CQUni and enable further self-guided exploration of SL. The workshop has been designed for a classroom setting, although anyone is welcome to participate in the activities. If you find this workshop useful or have some feedback, we’d love to hear from you. Comments are enabled at the bottom of this page. It is a work in-progress, and will continue to be updated.
Further information is provided in the following slideshare presentation.
Workshop Activities
The primary objective of this workshop is to investigate the possibilities this technology offers in terms of improving learning and teaching. To facilitate this investigation, a large portion of this workshop is focused on learning some basic competencies in the use of SL.
Following is a list of competencies you will learn in this workshop that will enable you to explore SL further to see whether it can assist your learning and teaching activities.
- Navigation
- General movement (ie. forward/back, left/right, strafing)
- Navigation assisted with your mouse
- Flying
- Camera views/controls
- Teleportation
- Communication
- Instant messaging
- Local communication
- Dealing with griefers
- Interacting with objects
- Avatar management
- Purchases
- Inventory management
- Avatar appearance
- Search
- Finding places
- Finding objects
Activities Checklist
This workshop is based on a single blog page containing over 20 activities. To help participants see where they are going and where they are up to, an activities checklist document is available for printing. Each time you complete an activity, you simply tick it off using the printed checklist.
Community/Society
SL has its own culture and there are social rules that you should adhere to. These rules are part of the Second Life Community Standards and comprises the big six naughty behaviours that will result in suspension or expulsion from SL. To summarise, they are:
- Intolerance
- Harassment
- Assault
- Disclosure
- Indecency
- Disturbing the peace
Nothing out of the ordinary and quite tangible to real life community expectations. There are also some resources around general etiquette in Second Life which may be of interest, although probably not all too relevant at this early stage. There is the SLetiquette webpage as part of the Second Life wiki, and an interesting blog article on Second Life Etiquette from C.C Chapman which may be of assistance.
Finally, this is the part where I mention that SL contains explicit adult material, and accessing or engaging with this material in this workshop using University resources contravenes the University’s Use of Internet, E-mail and Computing Facilities Policy. If you are curious, best left for your personal time and resources. 🙂
Computer Requirements
Second Life has fairly stringent requirements in terms of computer hardware support. Refer to their System Requirements page for more information.
Groupwork
You will be working through this session in pairs, so take a few minutes to find a work partner, and then write your names up on the whiteboard. For those not involved in the face-to-face workshop, you can complete most of the activities flying solo.
For the first half of the workshop, you will need to work side-by-side, so rearrange yourselves in the classroom so you are seated together.
Computer Setup

Start SL by clicking on the Second Life icon on the desktop. Before logging in to SL, resize the SL program window down by clicking on the restore button as shown (see right) so that it is no longer full-screen. Running Second Life full-screen may cause your computer to crash, as the lab computers at CQUni are somewhat underpowered for Second Life at full-screen.
Now type in your avatar name, password, and press the Connect button. This information can be found in the registration email sent to you from the Orientation Station Registration web site. Use your CQUni webmail to access these details.
When you first arrive in SL, you will be born into Orientation Station’s Scholar Island. Yes, you are born in SL. 🙂 If however you are using an avatar you have created previously that was not done through the Orientation Station Registration website, then you will need to follow these instructions to teleport to Orientation Station Scholar to join the group.
About Orientation Station
Orientation Station is structured as a sequence of small activities denoted by signs. It takes you on a journey through a building completing stations (activities) as you go, each of which are numbered.
Zooming and camera controls (5 mins)
Before we get started on the station activities, I would like you all to watch the following youtube video on camera controls. Then we’ll complete the following activity before moving on through Orientation Station.
When navigating SL, there are two aspects to consider – the position of your avatar, and the position of your camera. Your camera is simply what you see on your screen as you move about the virtual world. It need not represent what your avatar might be able to see based on its position. By default when moving around, your camera has a 3rd person view positioned just behind your avatar’s head. Sometimes you may wish to look at things that are too difficult for your avatar to reach to be close enough to see. We will now experiment by changing this camera view and demonstrate how useful it can be. This cheat sheet for camera controls may be of use to you in this activity.

Turn your avatar around using your left or right arrow keys until you can see what is shown in the image above. Now, move your mouse over the pink sign in front of you, hold down your Alt key, click and hold your left mouse button and move your mouse forward. This will zoom your view onto the pink sign. Note, it does not move your avatar – it only changes how you see the virtual world. Once you have zoomed in on the sign, you should now be able to read it very clearly. If while still holding your Alt key, you also hold the Control key, with your mouse, you can tilt the camera position up and down. Finally, adding the Shift key to the Alt/Control combination, you can move your camera side to side, and up and down. Its worth the practice with these keys as it will become much quicker than using the camera panels discussed in the video.
Tick off Zooming and camera controls on your activity tracking sheet.
Snapshot/Postcards (5 mins)
After experimenting with the camera controls and zooming, use these skills to zoom in on your partner’s avatar’s face, similar to the example shown below. Have your partner move around, and see what happens with your camera’s view.

Once you have positioned your camera view to give a close up of your partner’s avatar’s face, we are now going to take a photo using the snapshot function in SL. We are then going to send this photo to your partner as a postcard.

To take a snapshot for a postcard, click on the Snapshot button located at the bottom of the window. Make sure the Send a postcard option is selected, then select an image size of 800×600 as illustrated left. Next click Send and type in your partner’s email address. Type a subject and a greeting in the message area. Finally, click the Send button to email your postcard. Both parties should have a turn at sending a postcard. If you are doing this activity alone, send the postcard to yourself. Then you might like to send another to a friend – just repeat the steps.
After sending the postcards, open up your email and view the postcard sent by your partner.
Tick off Snapshots/Postcards on your activity tracking sheet.
More on Postcards and Web 2.0
As we progress through the workshop, you will be making use of the snapshots and postcards functionality to document your travels. This is an opportunity to reflect on what you are learning, to share with others your triumphs, and to have some fun. You will be sending your postcards to an online service called SnapZilla. “SnapZilla is a photo sharing site built specifically for Second Life…” and we will be using this service to publish your exploits during this workshop. Firstly, let me assure you that no publically identifiable information will be published via this method. All that will be visible to those viewing the SnapZilla website is your avatar name, your location in SL where the snapshot was taken, your comments in the postcard, and when the photo was taken. Your email address and real name are not shown. To send a postcard to Snapzilla, all you do is set the recipient’s email address to pics@slpics.com
CDDU will create a custom RSS feed from this service containing all the postcards from participants in the workshop and make them available on the cddu wiki site. This is so each of you can see what others got up to during the workshop.
Station 1 – General Movement (2 mins)
By now, most of you should have probably mastered general navigation in Second Life, most likely using the arrow keys. There is also a navigation cheat sheet available with some extra tips and tricks. This part of the workshop provides a few extra hints and tips about navigating. So we are now going to start our tour of Orientation Station.
Tick off General Movement on your activity tracking sheet.
Follow the pink arrows on the floor and move onto Station 3.
Station 3 – Walking sideways – strafing (2 mins)
When facing the Station 3 sign, hold your shift key and press the left arrow. This will cause you to walk sideways to your left and is known as strafing.
Strafing can be useful when you are viewing items on a wall, such as pictures or items for sale. You can walk sideways while still viewing the items in front of you.
Tick off Walking sideways – strafing on your activity tracking sheet.
Turn to your left, and you should see station 2.
Station 2 – Mouse assisted navigation (2 mins)
Remember, if you have difficulty reading the station sign because the writing is too small or blurry, use the camera zoom functions to position your screen’s camera view so that the sign is clear.
Using the mouse to set your direction while using your up and down keys to move forward or backwards is a very easy and efficient way to move about in Second Life. Try this as you move onto Station 8 & 9.
Stations 4 through 7 relate to voice in Second Life which sadly we do not have headsets to experiment with at this time. If you are following this orientation and have a headset, it is a worthwhile exercise to complete your voice setup.
Tick off Mouse assisted navigation on your activity tracking sheet.
Station 8 & 9 – Purchasing an item (5 mins)
Follow the instructions to purchase an item. What item exactly do you ask? Items for sale are usually packaged up into a cube or a poster on a wall. There are some to the right of Station 9 as illustrated below. Try right clicking on different objects and see if a Buy option appears in the circle menu.

Tick off Purchasing an item on your activity tracking sheet.
Station 10 & 11 – Accessing your inventory (2 mins)
Follow the instructions and explore through the items in your inventory. Can you find the items you purchased at the previous station?
Tick off Accessing your inventory on your activity tracking sheet.
Station 12 & 13 – Opening a box from your inventory (10 mins)
Locate the box you purchased from station 9 in your inventory. Use the Recent Items tab in your inventory which shows only items you have added in this session. Drag the box you purchased from your inventory to the ground. Right click the box on the ground and choose Open. Copy the items into your inventory.
Make sure you take back your box by right clicking on it and choosing Take. Otherwise, we’ll clutter up the room.
Tick off Opening a box from your inventory on your activity tracking sheet.
Station 14 – Shapes and clothing (10 mins)
Locate the 2 boxes on the table in front of this station. Each box contains either male or female shapes and clothing. Purchase one of the boxes. Now try on some of the shapes and clothes.
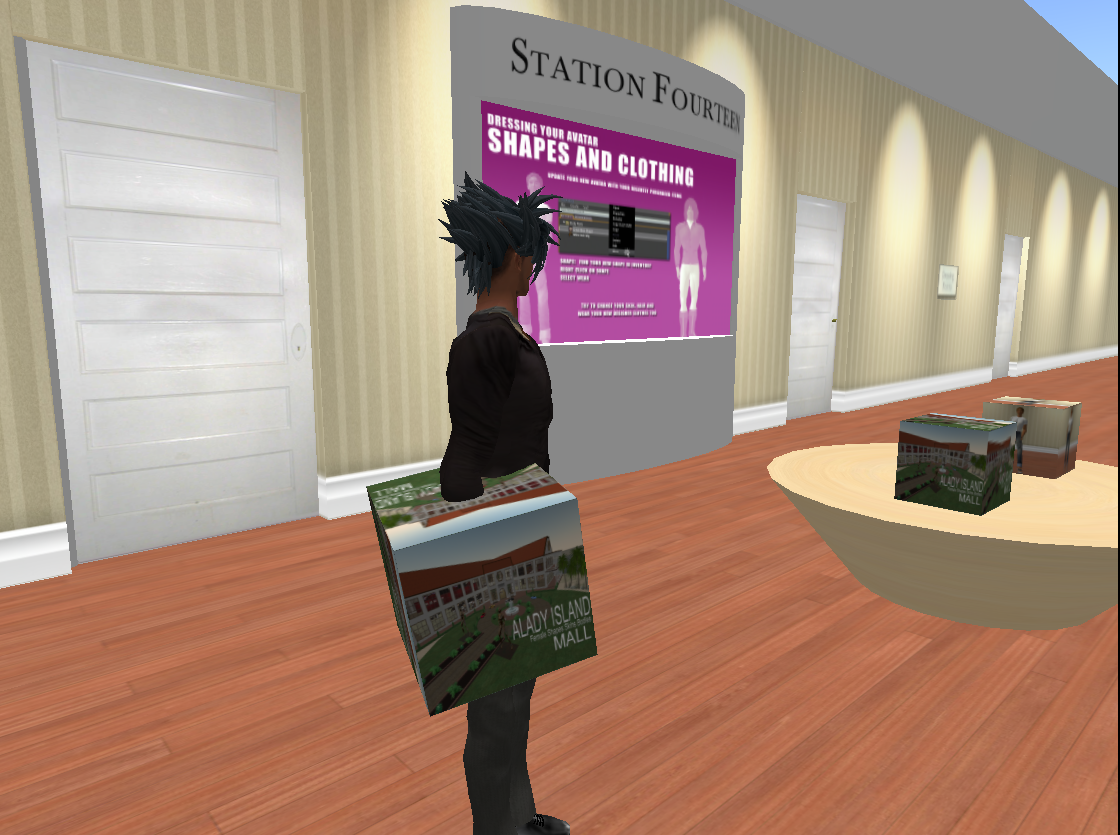
Note, if this happens to you (see left), then you have attempted to wear the box the female shapes and clothing came in. Right click the box that is attached to you, and choose Detach. Follow the instructions again from Station 12 and 13 to open the box and copy the contents. The male box when purchased will copy the contents directly into your inventory using the folder Male shape, skin and hair. Keep in mind when purchasing items, that they can appear in your inventory in different ways. Best way to find newly purchased items is to use the Recent Items tab.
When opening the female box, and copying to your inventory you will receive a notecard with instructions on how to wear the items. Experiment with the body shapes, hair and clothing. Note there are dressing rooms either side of this station for the modest. How do you open the door? Click on it of course, and same to close it.
The samples provided at this station are all based on typical human appearance. However, don’t let this limit your imagination. You can change your shape and appearance to resemble almost anything, including things like animals or robots for example. Below are two examples of avatars that I have come across in my travels, minus their SL identities.
|
|
|
There will be opportunities to change your appearance further at the next station. So no more than 10 minutes on this station. 🙂
Tick off Shapes and clothing on your activity tracking sheet.
Station 15 & 16 – Changing your appearance (10 mins)
Before experimenting with your appearance, I recommend making an outfit out of your existing appearance first. This way, if you stuff things up, you have something to go back to. To do this, right click your avatar, and choose appearance.

Next, click Make Outfit and give a name to the folder your outfit will be put in your inventory, such as Default Outfit. Make sure you tick all the items you are currently wearing, including your shape, skin, hair, and eyes. Then click Save. Your outfit will be saved into the Clothing folder in your inventory. You can find it quickly by going to the Recent Items tab of your inventory.

Repeat those steps again, except this time name the folder for your outfit Default Outfit Backup. Now that you have saved your current appearance, follow the instructions for Station 15 and 16 and experiment with the settings.
Now, playing with the appearance settings so as to make yourself look incredibly silly and ridiculous – the more so the better. When you are happy with your silly look, take a snapshot and send a postcard to Snapzilla (pics@slpics.com).
To change back to your original appearance (if you wish to), go to your inventory, right click on the folder name you gave your original outfit, and select Replace Outfit. This will replace your current appearance with the one you saved earlier.
No more than 10 minutes on this station. 🙂
Tick off Changing your appearance on your activity tracking sheet.
Station 18 – Mouselook (2 mins)
Remember, if you have difficulty reading the station sign because the writing is too small or blurry, use the camera zoom functions to position your screen’s camera view so that the sign is clear.
While in mouselook, try walking around. What do you notice is different with navigation buttons (arrow keys) and mouse controls while using mouselook?
Tick off Mouselook on your activity tracking sheet.
Station 19 – Poseballs (5 mins)
Share a bench seat with your partner by right clicking the Sit poseball and choosing Sit here from the menu. Now take a snapshot of you both sitting together and send a postcard to Snapzilla (pics@slpics.com).
Be careful which poseballs you select in some areas of SL as some will animate your avatar, perhaps in ways you did not anticipate. To stop any poseball you have selected, click the Stand up button at the bottom of the window.
Tick off Poseballs on your activity tracking sheet.
Teleportation Basics (10 mins)
After completing Station 19, move into the next room.
Please wait until the remaining participants catch up before continuing.
You will see a large globe similar to the image below which represents a map of Second Life. You can see a red pin on the globe which represents your current location. This demonstrates the scale of this virtual world. In fact according to Reuters in early 2007, the Second Life virtual world spanned 360km2. It has grown since then. By comparison, North Rockhampton has an area of roughly 25km2.

So considering the sheer virtual size occupied by SL, how is one to travel from one place to another? You could walk but consider the blisters your poor avatar would have to endure. 🙂 There is also flight in SL (which we have yet to get to). But even then, flight speed is limited and your avatar wouldn’t appreciate the chapped lips. So comes teleportation to the rescue.
What is teleportation you say? This is a virtual world and is not restricted to real-world physics. So in SL, you are able to move from any one part of the virtual world to another almost instantaneously through teleportation. Much like it was done in Star Trek if you remember back that far :). So how do we do it? There are a couple of ways to identify a destination for teleportation. You can find locations in-world and click on the teleport button. We’ll look at this in a moment. The other approach is often used on the web and is known as a slurl (Second Life URL). Its like a web browser internet address, but for locations in second life. You can access a slurl in your web browser, and it provides a link to click on that will tell your avatar where to teleport to. Click this slurl for CQU Learning Island.
You should see a web page something like this:

To teleport to this location, you click the orange teleport now button. You will be asked to launch second life, which you should do, and the location will appear in your Second Life window with a teleport button. Click this button in Second Life and you are away.
If your slurl web page does not show the teleport now button as demonstrated below, then you need to slide your map page upwards so the button is visible. Do this by clicking on the red circled up arrow button as shown.

You will arrive at the bridge adjoining the Bachelor of Social Work Collaboration sub-island. This region was used for SOWK19014 as a voice enabled collaboration area to complement the blackboard discussion boards. The rationale for the design as I understand was to provide a relaxing and engaging environment for students to discuss their studies.
Tick off Teleportation basics on your activity tracking sheet.
Flight (5 mins)
We are going to explore the Collaboration sub-island for a moment using flight. Use the cheatsheet provided in the class or the following summary of commands.
Fly up (Page Up)
Fly down (Page Down)
Forward/Back/Left/Right (same as walking)
Experiment with mouselook and see how it affects your flight controls.
Now we are going to do a flight activity to practice navigating small areas and landing. If you look towards the mountain in SL, you will see a platform hovering in the sky as shown below. Fly up to the platform.

When you arrive there, you will be flying from this platform to another down the other end of the island. However, you must pass through a pipe on the way through. The platforms, and the pipe are all at different heights. To understand what I mean, watch the following video.
Practice a couple of laps.
Tick off Flight on your activity tracking sheet.
Landmarks and teleportation (5 mins)
Now that you have left Orientation Station, how do you get back? Watch the video below, or read the instructions that follow.
If you click the Local Chat button at the bottom of the window, you will see a screen appear with some notes about where you have been. You will see things like:
Teleport completed from http://slurl.com/secondlife/Scholar/170/166/25
or something similar. Every time you teleport somewhere, Second Life leaves breadcrumbs to show you where you have been much like in the story of Hansel and Gretel. Just look for the last slurl entry and that is the last place you teleported from. To go back, just click on it, and then click the Teleport button. Sadly it can be a little confusing the further you go back to actually remember what the slurl was for.
Scholar is the land location for Orientation Station, so try to find the last slurl that contains Scholar like the example above, and click on it, you will teleport back to Orientation Station. If you are lost, try this slurl to get you back.
So how do you better keep track of all these virtual locations in Second Life? Well we use Landmarks. You can think of Landmarks as bookmarks or favourites in your web browser. They are locations in-world that you can easily return to.
Start by creating a landmark for Orientation Station where you are now. Click on World, then Create Landmark Here. This should have added a Landmark into your inventory in your Landmarks folder. You can use this landmark to return to this location from anywhere in-world.
Tick off Landmarks and teleportation on your activity tracking sheet.
Search tutorial – Places (15 mins)
Please wait until the remaining participants catch up before continuing.
Open up the search tool by clicking the Search button at the bottom of the window. Select the Places tab and search for places that have a garden. Type garden into the search box, and make sure the Include parcels with Mature content is not selected, then click Search.
Don’t be surprised by what is returned in the search. The search information is provided by the land owners and is unmoderated. Furthermore, the search results by default are sorted in order of greater traffic. Traffic is the number of avatars that visit a land location. To better refine your search, try adjusting the category to Parks & Nature as illustrated below.

Try visiting one or two of the locations returned in the search. When you visit, see if you can find a waterfall or some other picturesque feature as a nice backdrop for a postcard. Send a postcard of yourself standing in front of the waterfall to Snapzilla (pics@slpics.com), like the examples shown below:


Tick off Search Tutorial – Places on your activity tracking sheet.
Search Tutorial – Objects (15 mins)
So you are happy with the outfit (or maybe not) you selected at Station 14 of Orientation Station, and decide you’d like to have a cool pair of glasses to go with it. How do you go about finding some glasses?
If your search window is not already open, click the Search button again at the bottom of your screen, and select the All tab. Untick the Include Mature content option, and type in the search criteria free glasses. This should reveal locations that contain this search string as illustrated below.

Click on one of the search results links and you will be presented with a description of the location, along with a list of objects found there similar to the image below.

The list includes prices (in $L) and co-ordinates as a trio of values thus (x, y, z). These co-ordinates tell you exactly where in that location the object can be found. Scan through the objects to find a pair of glasses that interests you. Look for ones that are free and not labelled DEMO or something similar.

Write down the 3 values for the co-ordinates, and then scroll back up and click the Teleport button to go to the location.
When you arrive, click on the Map button (not Mini-map) at the bottom of the screen. Now click anywhere inside the map so a little red ring appears. It doesn’t matter where at this point. You are now going to type in the co-ordinates you wrote down into the 3 boxes located under Location in the Map window, using the same order.

After doing this, click the Show Destination button, and you will see a big red arrow appear pointing you the way to your object. If you close the search window, by clicking the little x in the top right corner, you can follow the arrow which should guide you to the object.

The destination will be denoted by a bright red beam of light which extends up into the sky. If it appears too far away, or its not visible from where you are, you can teleport directly to the object. If you wish to teleport there, open the Search window again by clicking on the Search button, and then click the Teleport button.
You are now going to purchase the glasses. Hopefully you chose “free” ones, otherwise you won’t have any $L to pay for it. Refer back to notes on Station 8 & 9 for assistance with purchasing the glasses. Once you have purchased your glasses, attempt to wear them. Refer back to notes on Stations 10 through 13 if you need to.
Finally, take a snapshot of your face wearing your glasses, and send the postcard to Snapzilla (pics@slpics.com).
Tick off Search Tutorial – Objects on your activity tracking sheet.
Play time (10 mins)
Now we have finished our tour through Orientation Station, lets move onto something a little more fun. Next stop is Terra Incognita, a learning and teaching research area developed by Decka Mah (in SL) from the University of Southern Queensland. Use the Terra Incognita slurl to teleport there. When you arrive, look for the following exit to know where to go:

As you leave the visitor’s hut at Terra Incognita, you should walk past a sign that says Harlan Bay, and out onto a platform with a collection of games, most of which are for pairs. There is darts, arm wrestling, mud wrestling, and knife throwing amongst others. Team up with your workshop partner and try some of these games. You will need to experiment to work out how to control the games. They are simple, but loads of fun. I especially recommend the knife throwing. 🙂
No more than 10 minutes at this location. 🙂
Tick off Play time on your activity tracking sheet.
Teleporter Objects (5 mins)
Please wait until the remaining participants catch up before continuing.
After playing the games, return to the hut where you entered Terra Incognita.

Inside, you will find a teleporter that looks like this (see right). Note in spirit, this is the same sort of teleportation we have seen before. The difference is that teleporters as objects in-world can only teleport you up to 300 metres away from their current location. They are often used within a specific landmark to allow quick and easy navigation to its different parts without having to walk or fly. The teleporter machines can vary in appearance and how they operate. Experimentation is the key.
Click on the teleporter and a menu will appear in the top right corner, with a list of locations to teleport to.
Select 4 – Decka’s Decks by clicking button 4.

After selecting the location, the teleporter will change appearance as shown (see left). Note there is a white circle on the floor. You need to click this with your left mouse button to teleport to the destination. You only have 20 seconds to do it, otherwise you’ll have to start again. The teleporter objects are single use only, so each of you will need to take turns.
Tick off Teleporter objects on your activity tracking sheet.
Local Chat, Instant Messaging & Friendship (5 mins)
Let’s now experiment with the communication facilities of SL.
Firstly, click on the Local Chat button at the bottom left of the screen. This will bring up the communication window within SL. At the bottom are two tabs – Contacts and Local Chat as shown in the image below. You may remember this from the Teleportation and Landmarks part of the workshop.

The Local Chat tab shows text based communication going on around you. This communication is not limited to other avatars in SL. It also includes objects nearby that wish to communicate with you. In the example above, you can see instructions sent from the Teleporter object we used earlier. Who/what you can hear depends on how far away they are, and whether they whisper, say, or shout. The distances are explained on the Second Life Wiki.
Experiment now by typing a message to your partner in the local chat window. Then try moving further apart, even flying off the mountain a little to get some distance. Now retype your messages and see if your partner receives it.
If you flew off the Decka’s Deck Mountain, return and with your right mouse button, click on your partner’s avatar. Select Send IM… and a new tab will appear in your communication window with their avatar’s name as illustrated below. The same will happen on your partner’s computer.

Now you can type a message to your partner that nobody else will see. This works, no matter where your partner may be in Second Life, even in different land locations. If they are not currently logged into SL, then your message will be stored and send to them when they next login. The IM functionality can be very useful when working apart, or when you wish to have a private conversation.
Now, right click on your partner’s avatar again, and select Add Friend. This will send a little message to your partner asking if they’d like friendship with you. Essentially, the idea behind this is to form a circle of friends much like you do with an instant messaging application on your computer like MSN or iChat. By default, your friends can see when you in SL, although you can disable this. Your friends appear in the communication window, but under the Contacts tab as shown below. Click on this tab now.

This will bring up a list of all your friends (contacts) with a bunch of tick boxes beside their names. If you put your mouse over each of the icons at the top of the column (see red circled area in screenshot below), it will tell you what they mean.
Tick off Local chat, Instant messaging & Friendship on your activity tracking sheet.
Griefing (5 mins)
Like most social environments, there will always be those who take pleasure in spoiling things for others. SL is no different. In SL, these people are referred to as griefers. Griefing can take on many forms. Examples of griefing include harrassment using messaging, intimidation, pushing (where they use their avatar to push your around), or vandalism. Following is a video showing a griefing attack on US election campaigner John Edwards’ SL region.
There are resources around that provide advice on dealing with griefers. Something you may wish to look through at a later time.
Tick off Griefing on your activity tracking sheet.
Swapping Places
Please wait until the remaining participants catch up before continuing.
After completing the chat exercises, everyone needs to logout of their computer, and switch to another so that you are physically separate from your partner, and then log back in again.
When you log back into Second Life, by default you will return where you were last time you logged out. Being physically separated, you must now rely on the facilities built into SL to communicate with each other. This is important, because you are being set a team challenge.
Team Challenge (20 mins)
The challenge is to search for a real life size version of the Empire State building as found in New York, USA within Second Life. I will emphasise, it must be an authenticate replica in terms of size (ie. almost 400m tall). Use the search function in SL to find this location.
When you get there, you and your partner need to make your way to the top of the building and together, take a snapshot to send to Snapzilla (pics@slpics.com), like the example below. Include both of your avatars in the postcard.
You must be external to the building, and able to see the spike on top, much like the example below.

Go!!
Note, if you experience troubling flying to the top of the Empire State Building, here is some advice. To gain access to this hint, you will need to enter a password. When you get to the Empire State Building, there is a sign above the glass doors leaving the foyer out onto the street. The password is what is written on this sign, including correct capitalisation. 🙂
Tick off Team challenge on your activity tracking sheet.
Conclusion/Reflection
Some open questions for reflection after completing the workshop.
- Is Second Life what you initially thought it was? If not, how was it different?
- What are some of the positive aspects of SL you discovered?
- What are some of the negative aspects?
- Do you think SL can assist you with the problems you are currently facing with your learning and teaching? If so, how?
- Are you interested in pursuing SL for your course(s)?
Thank-you for your attendance and participation. 🙂

I think this is one of the best and easiest guides to follow which I’ve seen about Secondlife, Congratulations, Well Done!
Wolfie!
G’day Wolfie,
Thanks very much for your kind words. 🙂
It’s still a work-in-progress and there are a few things I’d like to improve on. Although its available to anyone, for face-to-face workshop delivery, the cognitive load is too high for a 3 hour session. It is also very sequential which works well for some, but less so for those who are more global thinkers. There is also a reliance on Orientation Station which as I understand it, has been sold to another group who has different ideas for the space . So its days are numbered. Hopefully Linden Labs will rescue Orientation Station, but I guess we will see.
Great hearing from you. I have checked out the ABC Island by the way. It looks great. There are actually people there which is a good sign of a good design. Congrats on your efforts there.
Cheers,
Damien.
Damien- I followed you to your page from the comment you made on my blog entr for CCK11. This is excellent material- I was in instructional design with Shell Oil and am in the Uni of Manitoba emerging technologies certification program. I am taking the Second Life course right now so this is a useful tool. Keep it up!! And follow my blog!
Great to hear from you Skip, and thanks for the kind words. I’ll follow your blog with interest.
Cheers,
Damien.